Pet Hair in Your Car: How to Remove It for Good
Remove pet hair by cleaning in this order: loosen, lift, vacuum, then repeat once, using a rubber tool on fabric, a pumice stone on carpet, and a soft brush on leather and seams. If you skip that order, hair works back out of weave and pile, traps dander, and can eat up an hour with very little to show for it. This guide maps the right tool, motion, and sequence to seats, carpet, mats, seams, and cargo areas, plus the point where DIY stops making sense.
What you’ll need
- Rubber dishwashing or nitrile-coated glove for fabric seats
- Vacuum with upholstery or pet-hair attachment
- Crevice tool
- Sticky lint roller for light residue and final touch-up
- Rubber pet hair brush
- Duct tape
- Microfiber towels
- Soft brush for leather
- Spray bottle
- Optional compressed air
- Optional fabric softener and water mix
- Optional removable washable pet seat cover or barrier
Why does pet hair stick differently on leather, fabric, and carpet?
Pet hair releases fastest from leather, holds harder on fabric, and embeds deepest in carpet because each surface changes how friction, static, and fiber depth catch the hair. Leather is smoother, fabric has more texture, and carpet pile lets short coarse hair work down below the surface where suction alone struggles.
Leather usually lets go, except at seams
Leather upholstery is less likely to hold fur than fabric. That matches PetsRadar’s leather-versus-fabric split and its note that leather retains less hair. The problem spots are stitching, piping, bolsters, and perforations. Fur gathers where two panels meet, then resists a flat wipe.
Use a soft brush attachment on leather, as PetsRadar recommends, and follow with a lightly damp microfiber towel. That cuts scratch risk compared with dragging stiff plastic across the seat. Be careful around perforated leather, seat-mounted controls, heated-seat elements, and occupancy sensors under trim edges.
Fabric grips hair through friction and weave
Fabric upholstery holds hair more aggressively because its fibers create drag in several directions at once. Short coarse dog hair is the usual trouble case. It can wedge into woven seat fabric and stay there after a basic vacuum pass.
wikiHow recommends using rubber gloves to gather fur into piles, and PetsRadar specifically advises a damp rubber glove for fabric seats. That works because the glove adds friction and a bit of static, pulling loose ends upward until the hair clumps enough for vacuuming.
Carpet and mats hide the worst buildup
Car carpet has deeper fibers than seat fabric, so hair drops below the visible surface and stays put during broad vacuum passes. Floor mats add ridges and backing edges where fur packs tightly. Working in small sections matters here, and MotorBiscuit recommends that approach when using a release spray.
On carpet, the motion matters as much as the tool. Lift upward in short passes instead of dragging the nozzle flat. wikiHow warns against using a hard plastic vacuum head on carpet, which can skim over hair and scrape fibers instead of lifting it.
Surface decision table
Best Pet Hair Removal Method by Surface and Buildup Level
| Surface type | Buildup severity | Recommended tool order | Estimated time | Risk level | When to stop DIY and book detailing |
|---|---|---|---|---|---|
| Leather seat faces | Light | Microfiber towel, soft brush, vacuum upholstery attachment, lint roller for leftovers | 5-10 minutes per seat | Low if tools stay soft and dry-to-damp | Stop if hair is packed into perforations or you notice marking from brushing |
| Leather seams and bolsters | Moderate | Soft brush, crevice tool, tape loop, damp towel | 10-15 minutes per seat | Medium because seams and perforations scratch easily | Stop if hair is below seam lips, near seat electronics, or needs hard picking |
| Fabric seats, smooth weave | Light | Dry or lightly damp rubber glove, vacuum upholstery tool, lint roller | 10-15 minutes per seat | Low | Stop if repeat passes still leave embedded short hairs across the whole cushion |
| Fabric seats, woven or textured | Heavy | Rubber pet hair brush, lightly damp rubber glove, vacuum, tape for seams, optional release mist | 20-35 minutes per seat | Medium because woven fabric can fuzz or snag | Stop if a second full cycle gives little change or the fabric starts to pill |
| Carpeted footwells | Moderate | Rubber brush, vacuum with lifting passes, crevice tool, lint roller or tape on edges | 15-25 minutes per footwell | Low to medium | Stop if hair is matted through the pile after two sections and brush friction keeps spreading it |
| Floor mats | Heavy | Shake out, rubber brush, vacuum, optional fabric-softener mist, repeat, tape on corners | 15-30 minutes per mat | Medium | Stop if ribbed mats still hold fur in every groove or backing stays damp after treatment |
| Seams, rails, buckles, anchors | Any visible packing | Crevice tool, tape loop, controlled compressed air, microfiber wipe | 5-15 minutes per area | High near sensors and seat tracks | Stop if air drives hair deeper, tape cannot reach, or wiring is exposed nearby |
| Cargo carpet | Full-area heavy | Rubber brush, vacuum, optional release mist, repeat by section, touch-up roller | 30-45 minutes total | Medium | Stop if the whole area needs repeated wetting or the pile stays visibly loaded after one hour |
What is the best method for your seat or carpet?
The best method depends on both surface and buildup level. Leather needs a soft brush and seam focus, fabric usually needs friction before suction, carpet responds best to brush-plus-vacuum in small sections, and tight crevices often need tape or controlled air after the main cleanup.
Leather upholstery
Start with a soft brush or microfiber towel, then vacuum with a soft attachment. PetsRadar recommends a soft brush attachment for leather, and that matters because leather scratches more easily than carpet or cloth. Vacuuming is mostly a pickup step here, not the main loosening step.
After the loose hair is gone, wipe with a damp cloth to catch the fine strands left on the seat face. Keep moisture light. Avoid over-wetting perforated panels, stitched seams, seat memory buttons, and trim gaps around electric controls.
Fabric upholstery
Use stronger friction first. A dry or lightly dampened rubber glove is safe for fabric and upholstery when used gently, and it helps clump hair into visible lines. For stubborn buildup, a rubber pet hair brush usually beats suction alone because it lifts embedded strands instead of skating over them.
Fabric often needs repeat passes. Short coarse hair and tight woven seat cloth are the two common slow cases. If the first glove pass barely changes the surface, switch to the rubber brush before vacuuming.
Carpet and floor mats
Brush first, vacuum second. Deep fibers hold hair below the surface, so flattening a vacuum head over the area can leave most of it behind. Work in small sections, which MotorBiscuit recommends, and use lifting passes on the pile rather than long dragging strokes.
The opening paragraph mentions pumice stone on carpet because it can pull stubborn hair from some heavy, non-delicate mat and cargo carpet. Treat that as a last-resort spot tool, not a standard first pick. It can abrade delicate pile, catch loops, and shed grit if used broadly.
Seams and crevices
The crevice tool matters here more than raw suction power. Hair packs into seat tracks, buckle recesses, child-seat anchors, mat edges, and the trim gap where the seat base meets the console. Use tape wrapped stick-side-out around two fingers or a narrow tool to dab these areas after vacuuming.
Compressed air can help, but aim it to move hair out where a vacuum is already waiting. Blasting into blind gaps can push fur deeper behind trim.
Remove pet hair step by step
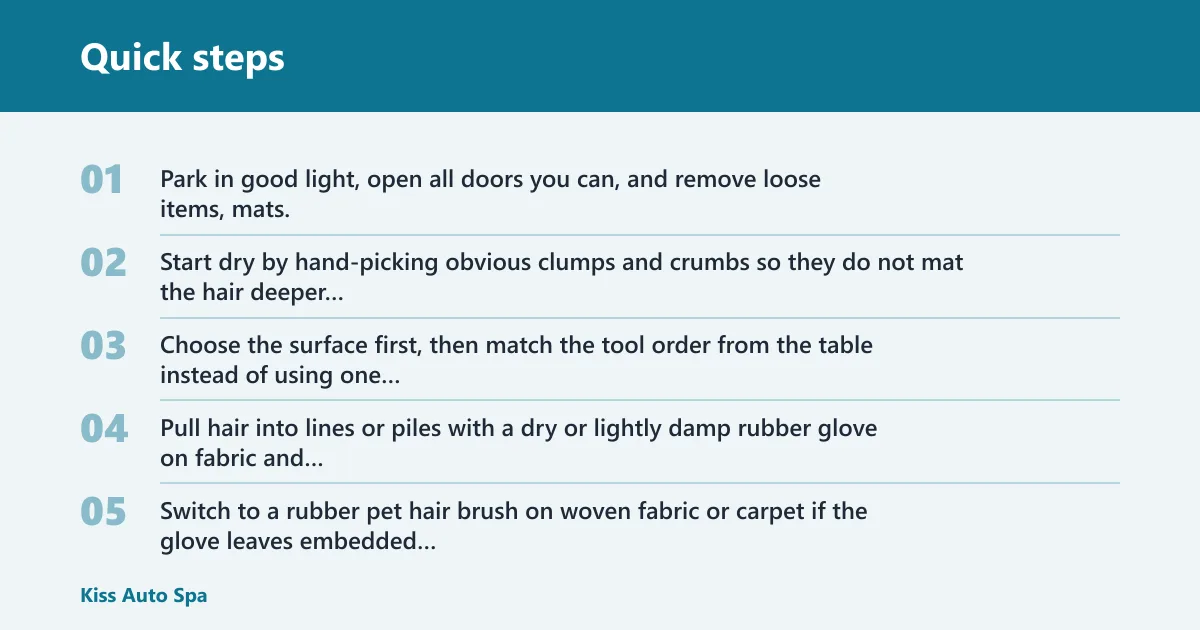
- Park in good light, open all doors you can, and remove loose items, mats, and pet gear before touching the seats.
- Start dry by hand-picking obvious clumps and crumbs so they do not mat the hair deeper into fabric or pile.
- Choose the surface first, then match the tool order from the table instead of using one method on every area.
- Pull hair into lines or piles with a dry or lightly damp rubber glove on fabric and upholstery, using short one-direction strokes.
- Switch to a rubber pet hair brush on woven fabric or carpet if the glove leaves embedded short hairs behind.
- Brush leather seams with a soft brush only, then wipe the seat face with a lightly damp microfiber towel.
- Vacuum after the hair is loosened into piles, because wikiHow says vacuuming works best after hair is already gathered.
- Use the upholstery or pet attachment on open seat and cargo areas, then swap to the crevice tool for seams, anchors, buckles, and trim gaps.
- Lift the vacuum upward from carpet fibers in short passes instead of dragging flat across the pile.
- Lightly mist stubborn cloth or carpet with a one-part fabric softener to seven-parts water mix if dry friction stalls.
- Wait about five minutes after misting, then brush again before vacuuming the loosened hair.
- Add more release mix in 1 light trigger pull per 12-inch section, then recheck, rather than soaking a whole seat or mat at once.
- Use lint roller sheets only for light residue or final touch-up, since wikiHow notes they are a quick solution for small amounts of fur.
- Wrap duct tape stick-side-out around two fingers for narrow crevices, mat corners, and seam mouths where a roller will not reach.
- Use compressed air only where you can immediately catch the hair with a vacuum and where no exposed seat wiring or sensor openings sit nearby.
- Recheck seat tracks, floor mat edges, rear cargo corners, and the gap between seat base and seatback before calling the job finished.
Say your back seat has smooth leather centers but cloth side bolsters. Treat the leather center as a wipe-and-vacuum job, then switch tools for the bolsters. Using the same aggressive rubber brushing across both materials slows the work and raises scratch risk on the leather without improving the cloth result.
Picture a cargo area with short white dog hair worked into dark looped carpet. A wide vacuum pass makes it look cleaner until the next stroke lifts more hair back up. Change one variable, switch from suction-first to rubber-brush-first, and the result usually shifts because the brush breaks the grip before the vacuum tries to collect it.
When should you stop DIY and book detailing?
Stop DIY when hair remains embedded after two full loosen-and-vacuum cycles, when the material is easy to mark, or when the work shifts from cleaning to picking individual strands. Heavy full-cabin buildup, perforated leather, delicate cloth, and seat-electronics areas are the clearest points where professional detailing becomes the smarter call.
Time-versus-result matters
If one seat or one footwell is taking 30 minutes with only a modest change, the rest of the cabin will likely cost more in time than a detail appointment. That is especially true for short stiff hair in woven cloth or deep footwell pile.
Professional detailers also have air tools, stronger extraction equipment, and better access around rails and seat bases. A light DIY cleanup makes sense. A whole-cabin rescue often does not.
High-risk materials need a shorter leash
Book detailing sooner if your interior has perforated leather, fragile cloth, looped carpet, contrast stitching, seat-mounted airbags under trim seams, or electric seat hardware packed with fur. Those areas carry real damage risk from stiff tools, over-wetting, or forced air.
If that didn’t work
If a glove pass did little, move next to a rubber pet hair brush. If the brush lifted hair but the vacuum left residue, add tape or a lint roller for final pickup. If a dry brush cycle still stalls, use a light fabric-softener mist on cloth or carpet only. If two complete cycles still leave visible embedding across large areas, stop and book detailing.
Common mistakes
Vacuuming before loosening
wikiHow recommends gathering fur into piles first, and that order saves time. Suction alone often skims over embedded hair, especially on carpet and woven cloth.
Over-wetting seats and mats
A release mix can help, but cloth should be lightly misted, never saturated. Keep spray off seat switches, trim seams with electronics behind them, and perforated leather. Excess moisture can push grime deeper and lengthen dry time.
Scrubbing leather with stiff tools
Leather holds less hair than fabric, so it rarely needs aggressive friction. Use a soft brush and damp cloth. Avoid hard plastic heads and abrasive stones on leather, bolsters, or perforations.
Using abrasive stones everywhere
Pet hair stones and pumice-style tools are not universal interior tools. They can snag looped carpet, rough up delicate upholstery, and abrade leather. Reserve them, if used at all, for stubborn hair on durable carpet or mats after gentler methods fail.
Ignoring the packed zones
Hair hides in seams, seat rails, anchors, buckle bases, mat edges, and cargo trim gaps. Miss those spots and the interior can look dirty again as soon as the next trip shifts trapped hair back into view.
How do you keep pet hair from coming back?
The closest thing to permanent removal is keeping new hair localized and doing quick cleanups before it embeds. A removable washable pet seat cover or barrier contains most of the mess to one zone, and a short weekly touch-up keeps fabric and carpet from reaching the stubborn stage again.
Localize the problem
Use a pet seat cover or barrier that comes out easily and can be washed. It keeps hair on one removable layer instead of letting it spread across seat creases, carpet, and cargo trim. That also speeds touch-ups after a single trip.
Keep the interval short
A five-minute cleanup each week is usually far easier than a monthly deep removal. Focus on the pet zone first: cover, seat face, seams, floor mat, and the nearest footwell. Lint rollers are useful here because they are portable and meant for small amounts of fur.
Match maintenance to shedding
Increase quick vacuuming and brushing during heavy shedding or after long rides. Grooming matters too, but inside the car the practical win comes from preventing buildup from settling into weave and carpet pile in the first place.
Frequently asked questions
What is the best way to remove pet hair from car seats?
On fabric seats, start with a dry or lightly damp rubber glove or rubber pet hair brush, then vacuum, then finish with a lint roller. On leather seats, use a soft brush and damp microfiber towel first, then vacuum the seams with a soft attachment and crevice tool.
How do I get pet hair out of car carpet and floor mats?
Work one small section at a time. Brush the carpet or mat first to lift hair from deep fibers, then vacuum using short upward passes. If hair still clings, lightly mist cloth-safe areas with a one-to-seven fabric-softener mix, wait five minutes, and repeat.
Does a rubber glove work better than a vacuum for pet hair?
For embedded hair, yes, often as the first step. wikiHow recommends rubber gloves to gather fur into piles, and vacuuming works best after that loosening stage. For loose hair and final pickup, the vacuum is faster. The two tools work best in sequence, not as substitutes.
Will a lint roller remove pet hair from car upholstery?
Yes, but mostly for light buildup and touch-up cleanup. wikiHow describes lint rollers as a quick solution for small amounts of fur, which matches their real strength in cars. For embedded seat or carpet hair, start with rubber friction first, then use the roller for leftovers.
Can compressed air or static help loosen pet hair in a car?
They can, but only as support tools. The News Wheel recommends a balloon or dryer sheet to create static, and compressed air can blow hair out of tight gaps. Both can also move fur deeper into crevices, so use them only where a vacuum can catch the hair immediately.
Do I need a professional detail for heavy pet hair buildup?
Usually yes if the whole cabin is affected, two full DIY cycles barely change the result, or the interior has perforated leather, delicate woven cloth, or packed seat-track areas. At that point, pro air tools and extraction equipment often cost less than another hour of slow manual cleanup.